The art of Kicking up 🤸♂️
The priorities this week:
#1 Refining our kick-up
#2 Improving our stillness
#3 Reducing the gap between your alignments C2W, B2W and FS
#4 Getting more and more comfortable FS
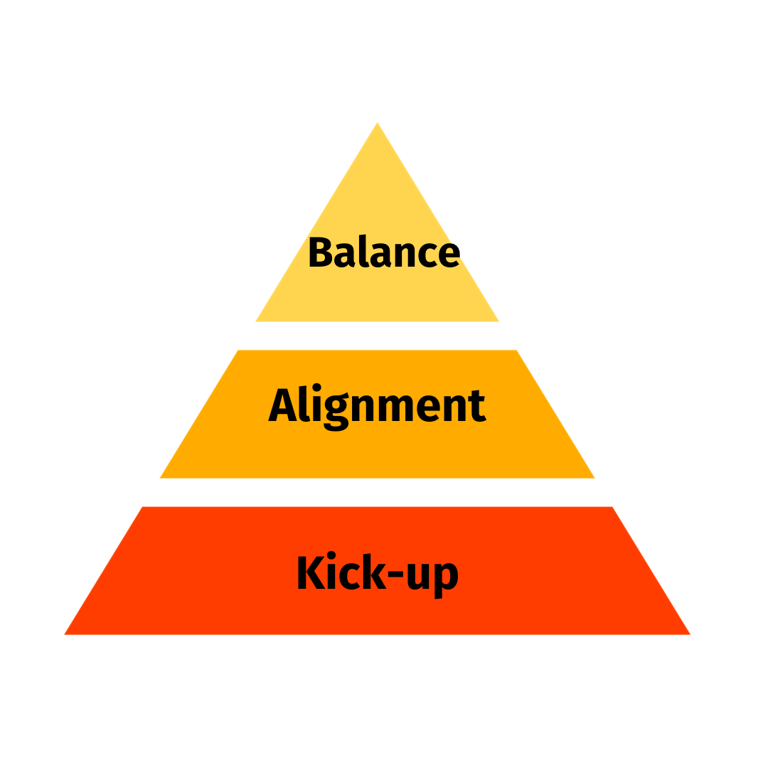
The Handstand Equation (reminder)
Our Handstand Equation for now is comprised of three steps we want to perfect:
- Kicking up, with the right amount of momentum, to reach the desired balancing zone.
- Alignment, achieving the desired line, positioning shoulders, legs and pelvis properly to expect to balance
- Balance, through the fingers only, which can ONLY do their job if the kick-up has the right amount of momentum AND if the line of your body is functional.
Sprinkle on top of that Body Awareness, Strength and Mobility drills when needed, and tackle the fear of falling - and you have a freestanding handstand.
Balance is the 🍒 on the 🎂
While everyone thinks handstands are about balance, they aren’t. There is an order of priorities that we can not escape from.
If you constantly undershoot or overshoot out of your kick-up, no matter how good your balancing skills, you won’t get a shot at using them.
If you have no clue what alignment you should try to achieve and why, no matter how good your kick-up and your balancing skills, you won’t get to balance, because your alignment will always take you off center.
In other words:
Balancing is the peak of a pyramid of skills at the base of which we find Kicking-up and Alignment.
This will inform the structure of your course.
Understanding this, and light of the reviews, we will zoom this week on the kick-up:
- what to do to maximise softness - and why softness is desirable
- the bad habits to get rid of - and why they are “bad”.
We will also assess your baseline level of strength, to know if you need to add some conditioning at the end of your sessions.
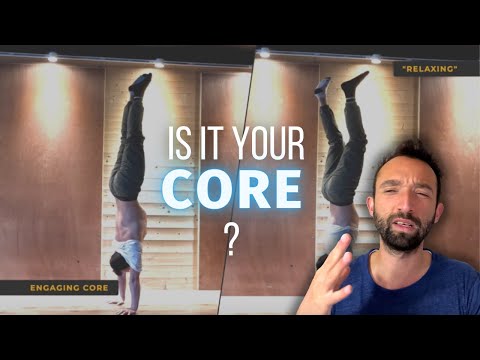
Your baseline strength level 💪
Strength is often misunderstood by students.
Beginners tend to overestimate it: I lack strength in my core to be able to go upside down, where they are actually more than strong enough to start working properly.
Improvers tend to underestimate it: I’m no beginner, I don't need to do those boring strength and conditioning drills. When actually, if they became stronger, their handstands would become more resilient, and they could work with better technique for longer.
Through this first module (well, second), I want to establish three landmarks for strength that will keep structuring your training for the next few years:
Three levels for strength
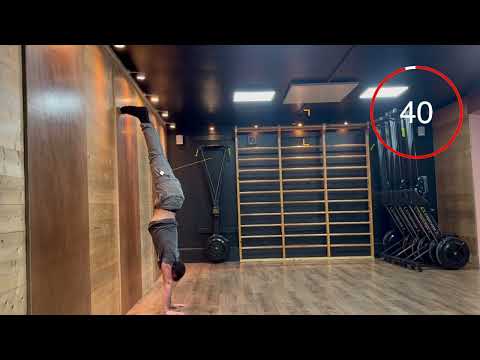
Minimum amount of strength (Beginners): 15 seconds in C2W Holds x 3 sets. Hands to wall: 2 - 3 feet. 1 minute rest between sets.
Desirable amount of strength (Improvers): 45 seconds in C2W Holds x 3 sets. Hands 1 foot from wall. Viable alignment. 1 minute rest between sets.
Recovery Strength (Intermediates):
→ undershot holds (planche) and overshot holds (falling towers). individual-specific, but roughly speaking, 5-8 seconds in the fallen position.
→ balanced elevators in relevant positions x 3.
more on this later…
Minimum Strength
What is the minimum amount of strength you actually need to begin handstands?
The short answer is, 15 seconds, 3 sets, chest to the wall, with your hands roughly 2 to 3 feet away from the wall.
To test: climb up the wall, set yourself in a safe position as close to the wall as possible. Take note of how far or close to the wall you are. Bring your feet together, try to stick your butt over the shoulders, out, away from the wall, if you do not know any better yet.
And start the timer now, try to hold it 15 seconds. If it's impossible of course, keep a bit of juice in the tank to come back down safely.
If you manage to achieve 15 seconds, rest for at least a minute and repeat the operation. If you manage to do successfully three sets, then you are strong enough to start working on the technique of handstands.
You have achieved the minimum amount of strength.
If you don’t have the minimum
This doesn't mean that you cannot work on the technical skills of handstands, but you need to build up more isometric strength in this position because your lack of stamina upside down is going to impact your training very early in your sessions.
If that’s you, at the end of each training session, you will perform 3 sets of C2W Holds.
Each week, you want to:
- add more seconds to the total volume (eg, if you held 10 seconds, then 12, then 9 this week, that’s a total of 31 seconds. Try to accumulate 33 the next week).
OR
- keep the same amount of seconds, but bring your hands 1cm closer to wall, if your hands are too far at the moment.
Diligently following this protocol will get you that minimum amount of strength in no time.
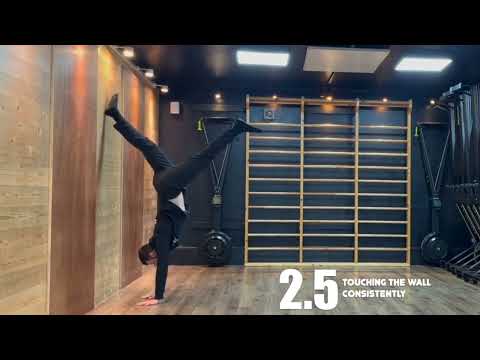
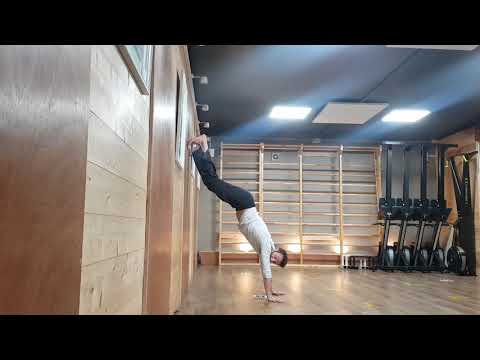
Meet your new best friend: the wall 🫂
In learning the handstand, we have a precious ally: The Wall.
Middly terrifying at first, it will quickly become your best friend.
However, the wall is a double-edged sword
It is both your best friend, because it will correct your mistakes like nothing else if you use it properly.
But it can also be the enemy hindering your progress, a crutch that we become reliant on in our journey and that prevents us from balancing without it. Using the wall isn’t something you improvise: it’s a mindful, goal-and-technique oriented practice that will yield benefits if you know what to do and what not to do.
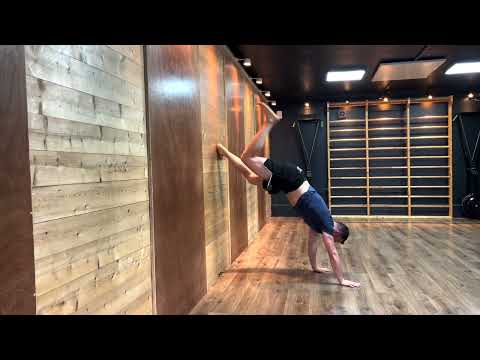
One of the most common mistakes I see in students who are able to kick-up against the wall is:
They take their feet off the wall and “float” as soon as possible without thinking twice.
We tend to think that, just because we are vertical against the wall, the real practice starts now.
That kicking up to the wall doesn’t really matter, or is too beginner. So we pull our bodies somehow away from the wall, enjoy the exhilarating few seconds of floating we achieve, and then fall back down to the floor.
The rule to live by when you practice on your own is the following:
💡 Whatever you do against the wall should aim at mimicking what needs to happen without it.
In other words, if your handstand looks different with the wall from what you what to achieve freestanding, something is wrong. The wall is a crutch, not a cane The wall feels like we’re reaching a basecamp, in which we can rest and recover before we jump into harder, more interesting balancing drills.
This leads people to accept a very drafty kick-up, as long as it gets them upside down, and dedicate most of their focus on what follows next. No matter how well you balance of that wall, even with perfect technique: a random, unreliable kick-up will prevent you from ever doing that consistently while freestanding.
The key lies in your ability to connect the dots together, and ensure that your practice is well-rounded and integrated.
The wall is well needed at first.
If it is a crutch, it needs to be a temporary crutch that helps us rehab our gait after an injury.
Progressively, week after week, as we diligently comply with the drills our physio gave us, we regain our ability to walk. We lean less and less on that crutch. We eventually don’t need it to walk anymore Next thing we know, we can run.
This is how the wall should be used in your practice, at different stages of it. However, if you don’t pay attention to the way you use it, it may well morph into a cane, without which you will not be able to walk.
Getting Acquainted
Before we start talking about making sure we don't grow too dependent on the wall, we want to gain confidence with it.
If you have never done it before, you need to learn to climb the wall safely.
This builds up confidence and strength, and is a pre-requisite for all the drills we will do with our body facing the wall tomorrow (C2W - Chest to Wall)
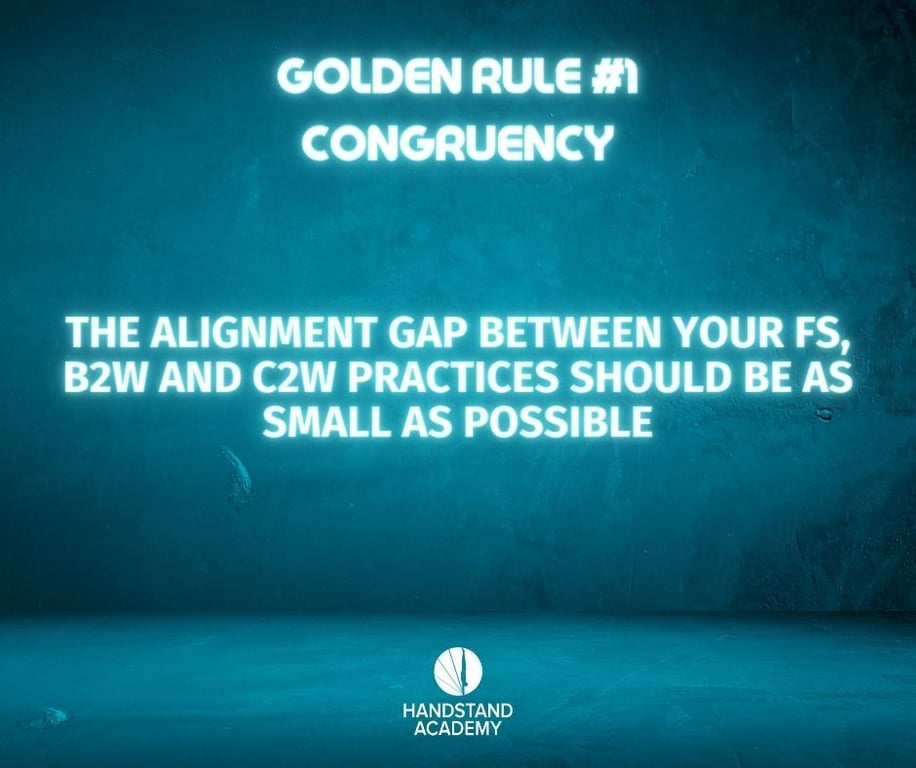
Golden rules: Congruency, lightness and the take-off obsession ❗
Congruency
The first thing that we want to notice out of your first homework review is: your handstand alignment changes (sometimes unbeknownst to you) depending on the context.
Your handstand doesn’t look the same B2W, FS and C2W.
Body awareness and fear are the two culprits to blame.
Simply put, the more you can be aware of this, the more you can practice one same handstand alignment - the one that suits you best. In the process, you will figure out faster the rules and sensations that govern this position, and will be able to find it more consistently.
On the other hand, if you practice within one same session a banana handstand, a straddle and a V open shoulder handstand without even realising it, you are sure to slow down your progress.
Viability
We will call a Functional or Viable Alignment whatever can be practiced with the wall and can / will eventually exist without it.
We shall call any other form of lines against the wall Dysfunctional or not viable.
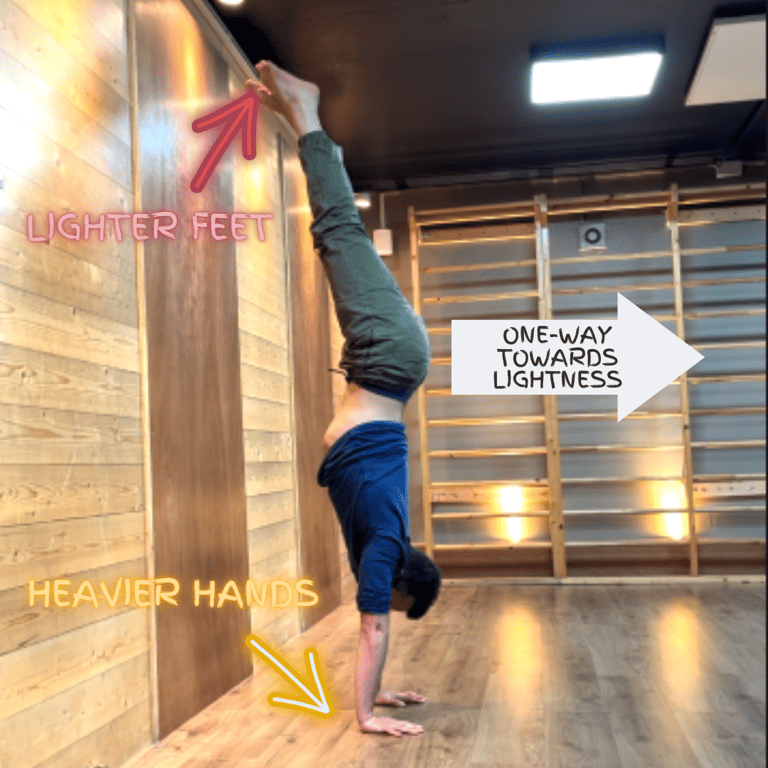
A functional line against the wall feels light.
The lighter, the more functional.
The way you set yourself up into a handstand C2W and hold yourself there is therefore extremely important to determine whether your line is functional or not.
I like to call this a One-way street.
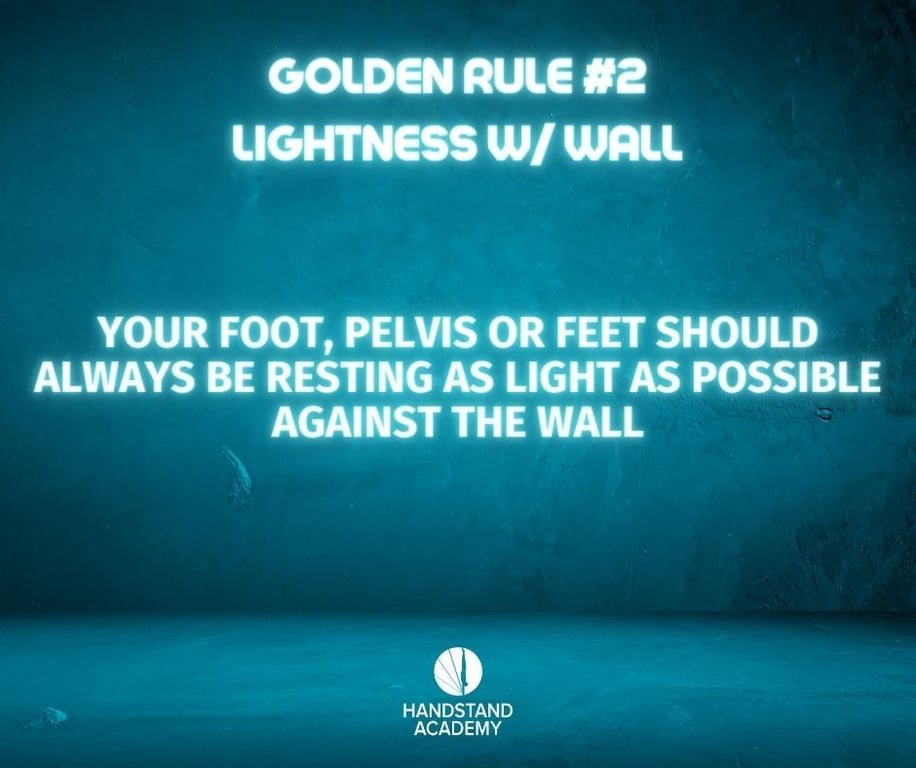
Your mission is to pour as much as your weight off your feet and into your hands and hold it there.
Eventually, once fear is managed, you will be able to make your foot / feet so light that they will take off the wall - this is where we leave the realm of take-off and enter the world of balance.
For now, pay attention to the way the weight shifts in your hands, and sometimes back to the wall.
Your mission C2W is to achieve an alignment as close as possible to a functional alignment.
A typical warm-up
A few notes on designing a good warm-up
First rule: NEVER, NEVER practice handstands without warming up your wrists first.
I recommend a minimum of 10 full minutes dedicated to the wrists only, at the beginning of the session, as well as a softer routine of massage and mobilization of 5 minutes at the end of the session.
Personally, I had to increase the volume up to at least 15 minutes a day to properly prepare my wrists for an almost daily practice in my early days. Many professionals today bitterly regret not having taken the time to do this. Learn from their mistakes and don't imitate them
Second rule: don't confuse warm-ups with joint preparation.
Doing hand circles for 5 minutes is a warm-up. Working on wrist mobility and the strength of hand and forearm muscles for 10 - 25 minutes is a prehab session. You need both.
UY a first routine to know what to do and how to do it when you warm up and prehab at the beginning of your training session.
Soreness 🤕
If you tend to experience serious soreness in the wrists in your practice - don't worry. You will get used to the demands of handbalancing in a matter of week.
If that happens, make sure to take a step back in terms of volume.
The prehab is be performed on rest days, without any attempt at handbalancing, if you experience soreness.
As I say in workshops - just do it when you watch Netflix, or when the kettle boils.
Do it, as you are performing something static during your day, so that it doesn't become a chore, but just something you do at the same time as a daily task.
It's one of the easiest ways for you to make sure you won't forget it.
Warm-up routine #1
For any warm-up, 10 reps / 30 seconds for tension drills is a good start.
Spend more time on the drills that you feel your body needs.
For shoulder health and mobility, you can add the following exercises, twice a week:
Shoulder flexion with stick x 10
Suspension x 20 - 40s
If you don't have a pull up bar at home - worry not. These are a nice plus, not a must.
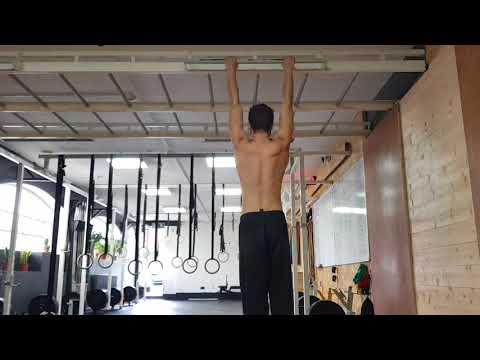
I will give you many more drills in the following modules. Meanwhile, use those videos as examples to inspire yourself from to design your perfect warm-up routine.
Module 2 Homework 📤
How to read your homework
🏋️♀️ Indicates the recommended volume for a standard session.
A Rep is the number of times you perform a drill.
A Set includes several successive reps.
3 reps x 4 sets means you are to perform the exercise three times in a row to complete successfully a set. You then rest, and repeat.
🎥 Indicates what is to be included in your homework
Awareness Session
To be done once from A to Z
and then
Homework
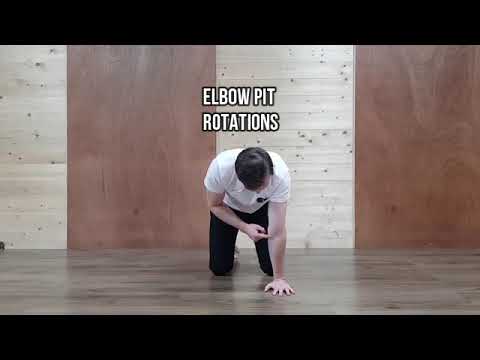
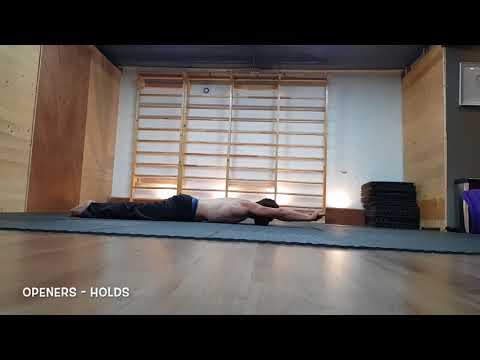
Include in ALL sessions at least one Awareness drill (body stillness section)
A) Hollow holds OR Reversed Hollow Hold
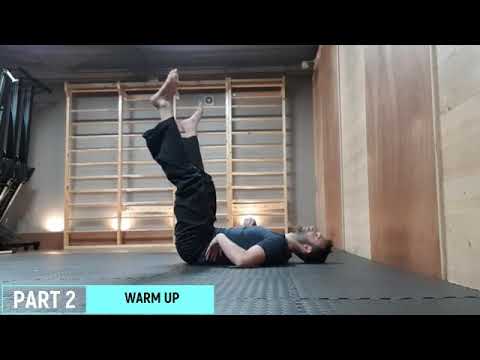
🏋️♀️ 30seconds x 3
🎥 1 set (15-20 seconds)
B) C2W holds x your average
🏋️♀️ 3 sets
🎥 1 set
❗Use the feedback from your assessment to perfect your position C2W (heavy hands, stacked pelvis, light feet), and re-assess your average hold from there (it may probably be less than last week).
Bailing 101
You may have been asked in your review to bail at the end of each C2W hold. If so, and if you’re unsure where to start with that, have a look here first.
PS: Climbing the wall 101
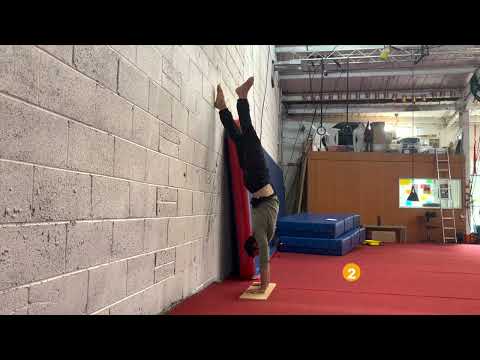
C) B2W kickups (foot to wall, Y shape)
🏋️♀️ 2 reps x 5 sets
🎥 5 kick-ups
❗Use the information in this module to pin down where you sit in the kick-up progressions and start focusing on that (landing consistently, softly, floating, etc.)
→ If I asked you to work on another shape in your review, include 5 sets of it in your sessions too.
→ Don’t try to balance when you practice your kick-Land on the wall, optimise your position if need be, and come back down.
→ Rest a good 15 seconds between sets. It feels like a lot. Quality over quantity, always.
→ Tension promotes softness in landing. Don’t skip the hollow holds :)
D) Freestanding practice (when relevant)
🎥 2 - 3 attempts
Suggested Template
ㅤ | Drill | Volume | 📹 |
Warm-up | Wrist and shoulder mobilisation | 10 minutes | ㅤ |
ㅤ | Hollow holds | 3 x 20s+ | 1 |
Alignment | C2W Holds (both legs on wall) | 15s x 3 with body silence | 1 |
ㅤ | C2W Holds (back leg off wall) | 15s x 3 with body silence | 2 |
ㅤ | Bail out of each rep | ㅤ | ㅤ |
Kick-up | Kick-up to wall (identical → soft) | 2 reps per set 5 - 8 sets | 5 |
→ The weekly homework is a reflection of your practice during the week. Post it once per week, when you are ready, at the end of the week.
→ If you have questions before that, send them to the group.
🕐 Note: Be careful to respect the time limit of the homework video. If you’re beyond the limit, try to be more selective and edit out the rest time.
Tracking your progress 📈
It is very easy to only keep your eyes on the prize - and the goalpost, trust me, will keep going higher.
To be fair with yourself:
→ you need to know what the next steps are
→ you need to celebrate each victory, each basecamp you reach
→ you need to assess the right metrics to know if your training is conducive to progress! Progress is hardly instantaneous in handstands, but knowing your metrics and gauging them every month will certainly allow you to continue on the same trajectory or tweak things accordingly.
Here is a template you can duplicate and use:
How progress works
Do not expect things to go from being invisible to you (the mistakes you made without realising it) to being perfect in just one week.
That’s not how handstands work.
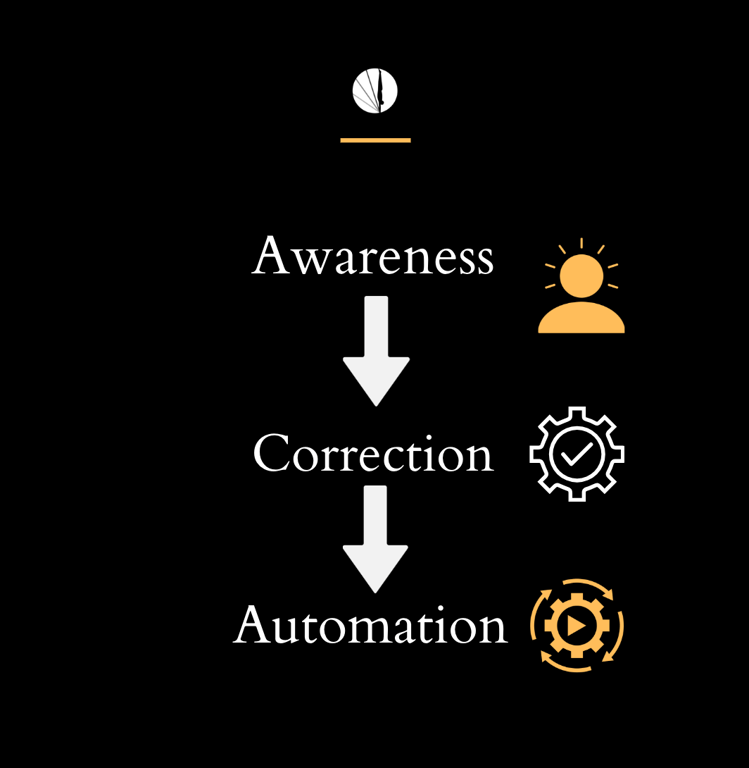
Through the Rocket, we want:
- to understand what ARE the mistakes you make and WHY they are considered as such
- to start noticing when we are doing
- to start fixing them, anticipating them and recovering from them
- to automate their recovery
This process will always be the same.
Recommended listen:
 Made with Bullet