
This is the first super-guide of the blue belt.
What is a pike ?
Pikes are one of the three alignment families in handstands.
The members of the pike family have the following, distinctive trait in common: the pelvis is overhead.
An overshot pelvis is what makes a pike a pike.
And of course, within the family, we will find many different members, with different degrees of relatedness, some easier-going than most, some better looking than others.
Open shoulders
The position of your pelvis upside is mainly the product of your shoulder flexion.
To a lesser extent, it will also be influence by the degree of spine extension and Anterior Pelvic Tilt (APT).
Your recipe for a pike therefore becomes:
Pike = open shoulders (80%) + spike extension + APT
There is always one guy…
If the definition of piking is to have the pelvis overshot, then, to be super thourough, yes: you’ll find people able to bring their pelvis overshot without having the shoulders fully open.
By looking at the equation above, you should know why: they have a greater degree of flexibility in their back, allowing that to compensate for shoulders that are either not fully open or not willing to fully open. After all, the more open, the scarier at first.
If that’s you, embrace it for Step 1 and Step 2 of the Blue Belt. We will make your pikes more shoulder-driven once you’re comfortable in them.
Undershot legs
Because of the Counterweight principle we studied in achieving your first shapes freestanding, we know that the legs will have to answer this new overshot pelvis placement.
In a piked shape, your shoulder angle is “fully” flexed, allowing the pelvis to be nicely stacked over the shoulders. (We can reinforce that by adding an anterior pelvic tilt and / or arching at the lower back).
In turn, the legs, either bent or straight, are positioned before the vertical axis, to counterbalance the pelvis.
If you think of a scale, you wouldn’t be far off: the butt is on one side, the pelvis on the other.
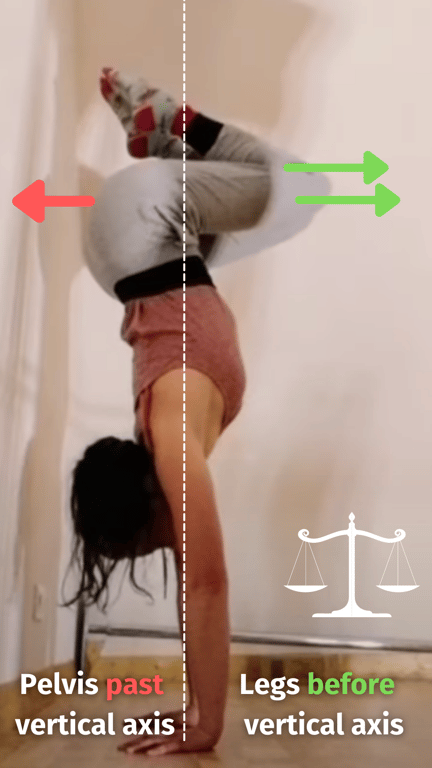
Importantly, the legs will lower more and more as the pelvis shoots farther and farther out.
Each pike shape has a continuum of variations, from shallow (pelvis isn’t really overshot and legs aren’t very low) to deep (legs closer to or below horizontal, pelvis very overshot). We will revisit this in step 3, when it’s time to improve your line or spice things up.
Your mission for now is to find a comfortable position where the pelvis can rest lightly against the wall.
From there, you will lower your legs just enough as to find a viable shape.
This is the piked shape you will work on.
Not deeper, nor more shallow.
⚠️ Shoulder collapsing
Shoulders will start collapsing forward when there is simply too much weight either undershot or overshot.
In other words,
if you tip the scale either one way, or the other, because both legs AND the pelvis start travelling forward or backward, the base of your scale won’t be able to hold that pressure.
Some people will be very aware and wary of the point of collapse. We will need to carefully explore it as to know what our limits are and build up strength.
Step 1: Do I have the required ingredients for this?
The main ingredient for most people will be open shoulders, but you’ll remember that some will have a heavier hand on the spine extension part.
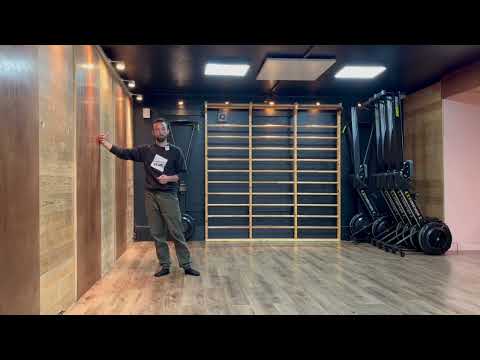
To assess if your body is ready for pikes, just like I show in the video:
- Kick-up with your fingers as close as possible to the wall (1 inch)
- Place your butt on the wall and take your feet off the wall. Keep your legs staggered (V shape) by default
- Lower the legs slowly until your butt gets light
- Push on the fingers till your butt takes off: if you take off, you are in a viable position, and you can pike!
📹 Film yourself. If you managed to take off but aren’t fully open at the shoulders, it will be good to note to start working on this in a few months.
Step 2: Selecting your favorite family member 👪
If you’re not sure about this yet, it would make sense to spend 1 - 2 weeks trialing the 4 main members of the Pike Family to see which is the one you should bet on. These are:
The straight or staggered pike
The frog
The straddle
The tuck
The Trial
No, it’s absolutely not about which one looks best.
It’s about which position you feel the most comfortable and in control in.
To know that, assess for each shape:
1. Kick-up Softness
If you can kick-up already in that position at the wall (without having to reshape once landed), which shape makes it the easiest to land softly?
- Ease of take-off
Once you have landed and you start pushing on your fingers, which shape feels the lightest and the easiest to take off from?
- Hold duration
Once you have taken off, which shape is the easiest to hold for the longest? This may differ from the answer you got from 2.
- Fear perception
When trying to bail from this position C2W or FS (or really, just simply about it and seeing the hair raise on your arms…), which position you feel the most secure in?
Step 3: Getting comfortable with your chosen position
Just like we did in the past, we will re-learn to kick-up with control, balance in, bail from, recover into this new position.
This will feel pretty different from your usual position. What to expect ahead of this journey:
- Less forgiving. Because the shoulders usually have to be super open, there is little room to adjust balance and correct for suboptimal alignments and kick-ups once you kicked-up into your piked handstand.
- Less forgiving, really. All counterweights aren’t equal, remember? Your pelvis being overshot is more likely to reduce the perceived size of your playground than, say, a leg. And where you could perform tools of macro-corrections if your fingers were giving in in a split leg handstand, you won’t have as many options at your disposal there.
- Flexible people, beware. If you have the flexibility to pike your hips (APT at the pelvis, pelvis overshot, and legs undershot) without fully opening your shoulders, you are facing an extra challenge. When we bring our shoulders to the end of their ROM, with usually can lock them in place and, while adjusting the counterweights can be tricky, at least we don’t have to worry about the shoulders. But if you’re flexible, you’ll sometimes pike in a somewhat closed shoulder angle - you will eventually have to ensure that you can differentiate an open shoulder pike from a slightly closed shoulder pike, and work on relying more (exclusively?) on your shoulders and less on your pelvis / lower back.
Now, the good news.
- A beautiful shoulder opener. Pike shapes can really teach you a lot about fully opening your shoulders, which itself transfers into your straight-ish shapes, such as the split leg V shape, the charger, the stag and the feet together I shape (cf: module about the straight handstand).
- More solid. It is a common feeling that once you find the position, balancing is much easier in a piked position. The amount of possible parasite movements is simply drastically reduced: your shoulders are locked in place (see above), your pelvis and legs have to have found their position to counterbalance each other… and both legs are now better locked, especially in the feet together pike and the straddle, less likely to move you out of balance.
- Did someone say fun? Pikes are fun to work on, offer pretty shapes and pave the way to advanced skills such as the press and the one arm. What’s not to like?
 Made with Bullet