Let's start with a few key statements:
- Holding a shape (anchoring) is easier than transitioning from one shape to the other.
- Rushing a transition will never teach you how to transition.
- Transitioning while you haven't practiced anchoring (static holds) enough will not produce the desired results.
Country houses and country roads
I like to define shapes as houses in which we need to settle in before hitting the road again.
Imagine that your handstand is a holiday road trip.
Each shape is a destination, a comfortabl-ish secondary home where you will stay for a few days to rest and enjoy before continuing your trip.
For your journey to be seamless, you need:
- the address of each house (anchoring)
- the map to go from one destination to the other (transitioning)
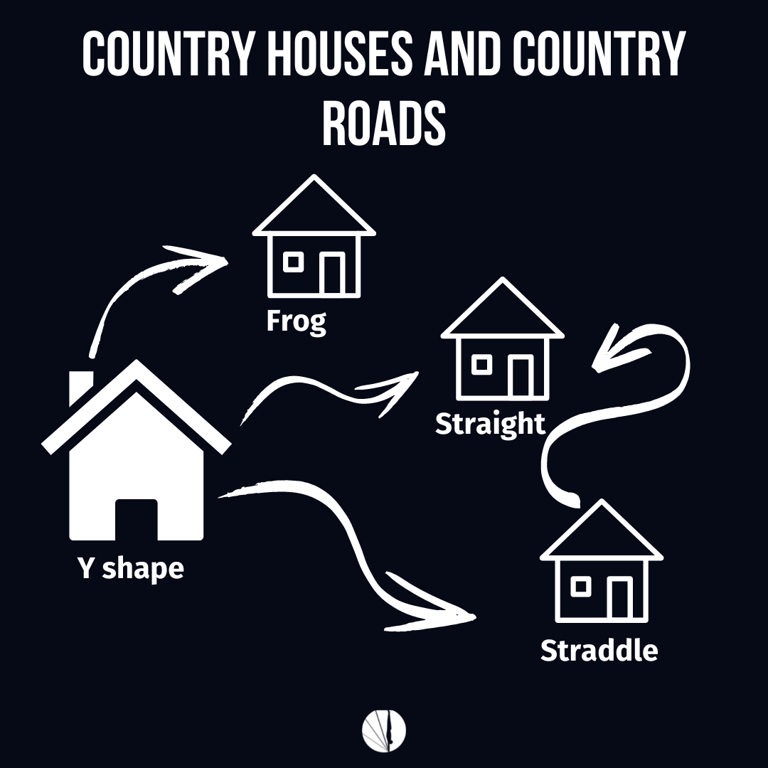
I like to further this analogy by defining the roads that take us from one house to the other as country, scenic roads. These are not highways. You are on holidays. You are not rushing. Remember?
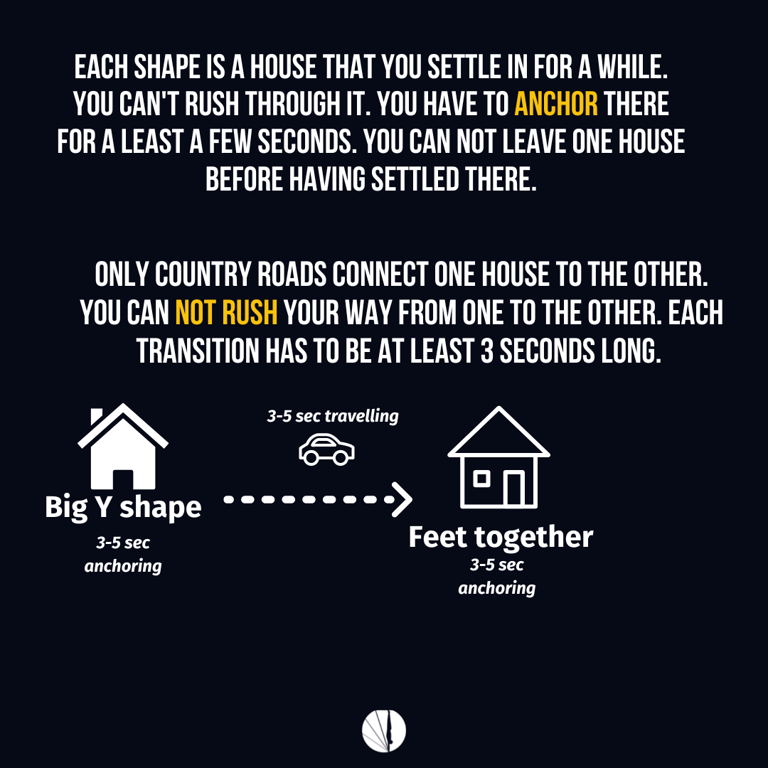
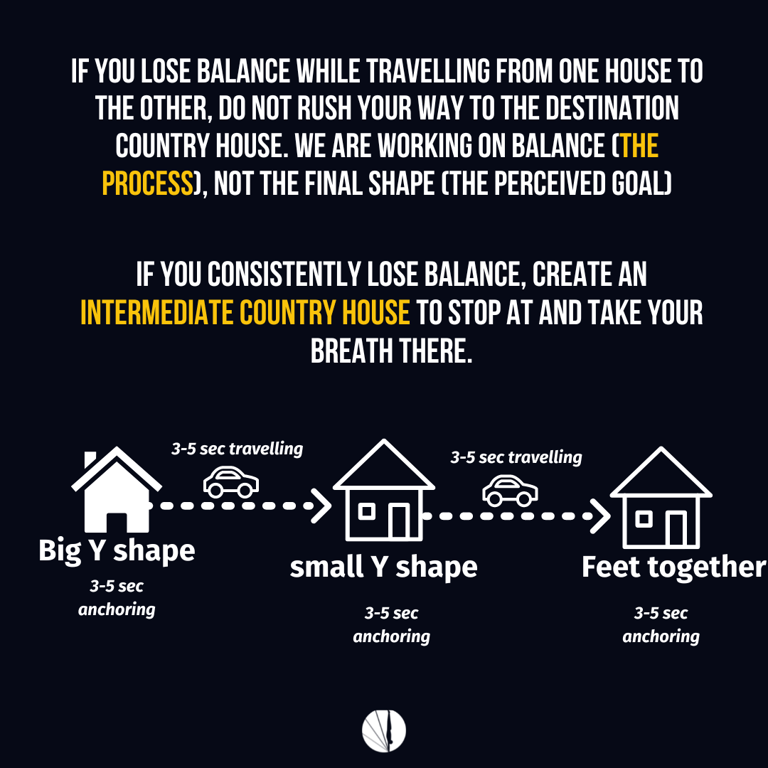
You may even take the time to park on the side of the road to take a few pictures of the landscape (pausing / creating intermediate country houses)
This will remind you of the logic we used in Blue Belt when getting used to piking:
When you are a Blue belt, you're working on figuring out what the pikes are. And that entails swapping your default line, which probably isn't as open as it can be, and has a questionable shoulder stack, to something that can accommodate the pelvis being overhead — which is a prerequisite for a pike.
This is a long process of discovery, where you get familiar with new positions after having worked so long on finding the one position that works best for you, with your strength, your limitations, your body, your nervous system.
To understand how you should train for this new chapter of your handstand life, and what drills to select as you progress through the blue belt, you want to think of your position — your default line, the one that you can kick up into with ease and hold your longest handstand in — as a starting point from which you will journey towards a new position.
We will call the starting point position A, and the end pike position you have in mind — where the shoulders are open, more stacked, and where the pelvis is overshot and one or both legs are on the shot — we’ll call that position F, for argument’s sake.
This allows you to reconcile a few things. You know and own position A, and you will need to habituate your body to position F, getting used to balancing it despite your references being so different — in terms of gaze, in terms of finger action, in terms of counterweight placement overhead.
You'll need to be able to kick up straight into this new position, which will prove challenging at first, even at the wall. You'll also need to mimic what will happen first, that is, transition from your default line to this new alignment — to practice the journey itself, the transition from position A to position F.
For there is something that you need to have very clear in mind: the new position, no matter how good you get at it at the wall, will not come naturally. That is, you won’t be able to kick up straight into it without blinking an eye. It will not become another one of your default lines until you have journeyed from position A to position F over and over and over again, knowing the path by heart.
This is the key for you to be able to eventually kick up straight into this new alignment without first stabilizing your default line.
Let’s take an example to make this crystal clear. Let’s say that Jane has a default line where her shoulders are over the first knuckles, her legs are in a stag position, and her shoulders are pretty closed. She wants to be able to hold a tuck position. The closed stag is position A, and the tuck-open position is position F.
To be able to kick up into her tuck, she will need to feel and practice what the tuck is in the first place: practice balancing in that tuck, practice kicking up with softness in that tuck. She will also need to practice the journey — that is, what has to happen most importantly at the upper-body level for her to transition from the stag to the tuck.
Even when she can do that at the wall, she will need to keep doing it over and over again, reducing the amount of mistakes in the process, to eventually be able to kick up immediately in the tuck without having stabilized her stag first.
This is extremely important. We do not get rid of our lifeline that easily, despite our practice at the wall, when we conquer new alignments.
In that journeying part — which again is one of the different components that will structure your pike training — lies the reason why we have labeled the final position F and not position B.
When you shapeshift, every intermediate position you find yourself in, at any moment from the moment you left the first position to the moment you land in the following position, is a position per se. Maybe it is simply a hybrid — nothing that you may find aesthetically pleasing — but the rules that govern each position are slightly different from the ones that are at play in the previous and the next position.
When somebody transitions from a stag to a tuck, a lot of sub-positions will be seen if you were to press pause in that transition. Each position will be slightly different in terms of how the shoulders have moved away from the fingers, how the shoulders have flexed ever so slightly, and how the counterweights — the lower body — had to adapt accordingly.
If you place your legs in what should have happened in position F when you're barely out of position A, you will fall. That’s what I mean by rules. And we want to be able to mark a pause and stop in each of these positions, even if they’re not in the horizon of what we want to be able to kick up into tomorrow.
In other words, I need you to be able, when you transition — when you journey, either at the wall or freestanding — to stop in position B, position C, position D, and position E.
 Made with Bullet